Webasto Timer 1530 User Manual
Operating Instructions. The 7 day timer with 3 time settings enables you to preset the start of the heater. Webasto Thermo & Comfort N.A., Inc. 7-Day Digital Timer Model 1531 - Installation Instructions. Lit907610a.pdf Download. 7-Day Digital Timer Model 1531 - Operating Instructions.
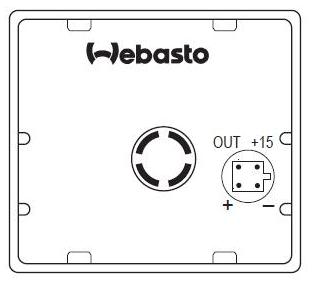
Timer Installation CAUTION Check behind panels for obstructions before drilling holes. ATTENTION Before installing the timer, please confirm the installation location with the customer. Affix supplied template to panel. Drill 10 mm (25/64 in.) and 2.5 mm (3/32 in.) holes where indicated on template. ATTENTION Do not over tighten mounting screw. Carefully align timer harness plug with socket on rear of timer and push into socket until seated.
Place the timer into position and secure with screw provided. Tighten screw until the timer with foam cushion is firmly seated against panel. Install cover over screw.
Operation: Operation of the timer is designed so that the symbols flash rapidly in the setting mode. If no button is pressed within 5 seconds, the displayed time will be saved. The display changes at high speed when the and buttons are pressed for more than 2 seconds. Whenever the power supply to the timer is disconnected, all previously programmed settings will be lost. Switching On: Manually: by pressing the 'Manual Operation' button (continuous heating mode). The heating time and the symbol for heating operation are displayed. The heating time display disappears after 10 seconds.
Automatically: upon reaching the preset starting time for heating. The program number and the symbol for heating are displayed. Switching Off: Manually: by pressing the 'Manual Operation' button. Automatically: via the programmed end time. The display field goes out when the heating time expires.
Setting the Time: This function is not available when heating mode is active! Press and hold the button. Press the 'Forward' or 'Reverse' button as well.  The time of the day is displayed and the clock symbol flashes.
Set the time via the 'Forward' or 'Reverse' buttons. The set time is saved when the display goes out or by pressing the button. Viewing the Time: Press the 'Forward' or 'Reverse' button. Program Start of Heating: Press the button.
Press the 'Forward' or 'Reverse' buttons within 10 seconds until the required time for starting heating operation is displayed. If a different program number is required, the button must be pressed within 10 seconds.
Default start settings: Time 1: 06:00 hours or 6:00 am Time 2: 16:00 hours or 4:00 pm Time 3: 22:00 hours or 10:00 pm NOTE: The default settings are overwritten when new values are entered. The preset times are saved until changed. The default settings are restored when the timer is disconnected from the on-board power supply. Deactivate Preset Time: Briefly press the button. Select Preset Time: Press the button within 10 seconds until the program number with the required preset time is displayed.
The active mode (heating ) and the program number flash. Set Heating Duration Time: Press and hold the button. Press the 'Forward' or 'Reverse' button as well. Release both buttons. The time and clock symbol are displayed.
Press and hold the button again. Press the 'Forward' or 'Reverse' button as well.
Release both buttons. The preset time is displayed and the heating symbol and ventilation symbol flash. Set the heating time via the 'Forward' or 'Reverse' buttons. The set heating time is saved when the display goes out or by pressing the button. NOTE: The default settings are restored when the timer is disconnected from the on-board power supply.

In this case, the timer will revert to the default heating duration time setting of 30 minutes. Set Remaining Time: The active remaining time can be changed between 10 minutes and 60 minutes via the 'Forward' or 'Reverse' buttons when heating mode is active. *Changing the Operating Mode. NOTE: Ventilation mode is not available on the BlueHeat heater. The ventilation mode is only available with certain heater versions. This information is provided in the event mode of operation is inadvertently changed.